Are you struggling to remove the RCD320 player from your VW Vento? Many car owners find this process confusing, especially when the connector isn’t a quadlock as expected. Upgrading or troubleshooting your car audio doesn’t have to be a headache. In this guide, I’ll show you an easy step-by-step process to remove the RCD320 player, including tools, tips, and visuals to make it quick and safe.
Whether you’re upgrading your head unit, troubleshooting audio issues, or just curious about your car’s wiring, this guide will give you all the answers.
Tools You’ll Need to Remove the RCD320 Player
Before starting, gather these tools to make the process smooth:
- Phillips screwdriver
- Flat plastic panel removal tool
- Optional: small flashlight for visibility
Tip: Using a plastic tool prevents scratches on your dashboard and panels.
Step 1: Remove the Panel to Access the RCD320 Player
The first step to removing the RCD320 player is getting the panel off safely.
Steps:
- Locate the two small holes on either side of the panel.
- Insert your panel removal tool or a thin screwdriver carefully.
- Gently pull outward to release the clips.
- Set the panel aside safely.
Tip: Be gentle, panel clips can break easily, and forced removal may damage your dashboard.
Image Suggestion: Place an image here showing the panel and holes for reference.
Step 2: Unscrew and Remove the RCD320 Player
With the panel removed, you’ll see the four screws holding the player.
Steps:
- Use your Phillips screwdriver to remove all four screws.
- Keep the screws in a small container to avoid losing them.
- Carefully pull the player straight out of the slot.
Question: Did you know some VW owners damage connectors by pulling too fast? Slow and steady prevents costly repairs.
Step 3: Disconnect the RCD320 Player Connectors
The last step is disconnecting the wiring safely.
Steps:
- Locate the main rear connector.
- Press the release clip and gently pull the connector out.
- If multiple connectors exist, handle each one carefully.
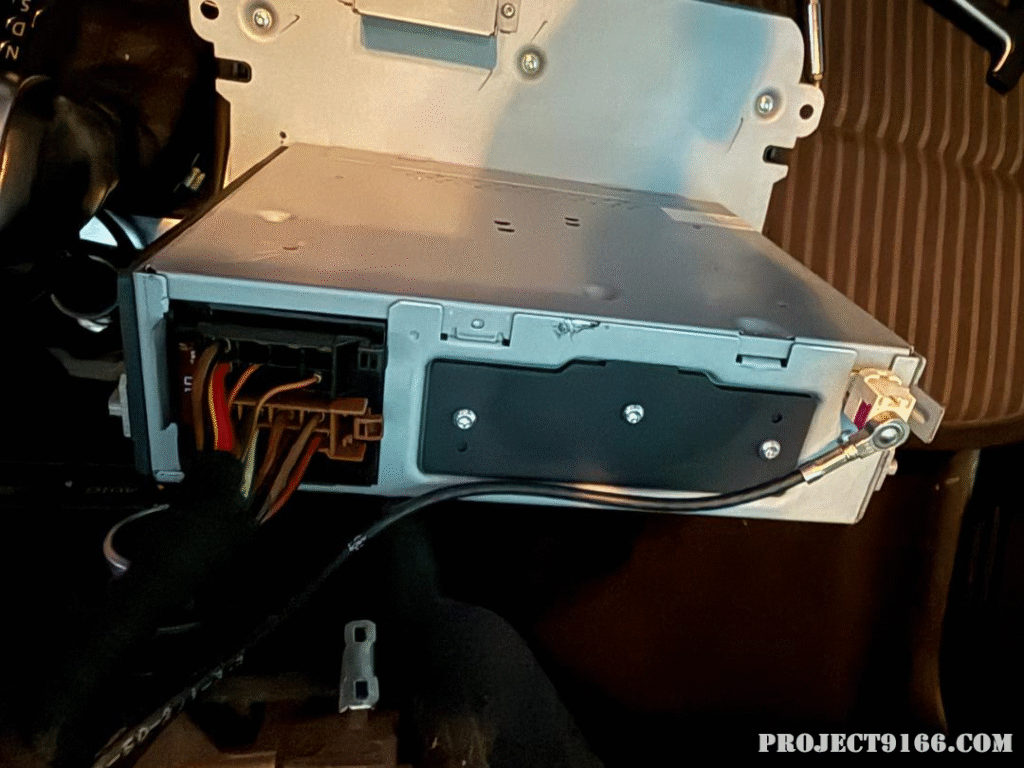
Notice this is not a quadlock connector, simplifying removal.
Tip: Take note of connector orientation to make reinstallation easier.
Image Suggestion: Close-up photo of the rear connector with the clip highlighted, placed before or after this section.
Optional Next Steps After Removing the RCD320 Player
Once the player is out, you can:
- Upgrade to a new player or Android head unit
- Clean connectors and check wiring for corrosion
- Test your system before reinstalling
Common Mistakes to Avoid
- Pulling the panel too forcefully
- Losing screws
- Disconnecting wires without pressing release clips
Frequently Asked Questions
Q: Can I remove the RCD320 player without damaging my dashboard?
Yes. Use a plastic panel removal tool and work slowly, following this guide.
Q: Is the VW Vento RCD320 player a quadlock?
No. The connector is a standard plug, not a quadlock. This makes removal simpler.
Conclusion
Removing the RCD320 player doesn’t have to be complicated. With the right tools, careful handling, and this step-by-step guide, you can safely remove your player for upgrades, maintenance, or troubleshooting. Watch the combined video and refer to the connector photo to make your DIY process effortless.