Diagnose Mira Engine Without a Scanner
If you own a Daihatsu Mira and the engine check light comes on, don’t panic. You can diagnose Mira engine problems quickly and easily—without a scanner. This simple DIY method uses blink codes from your car’s ECU to tell you what’s wrong. Surprisingly, many mechanics don’t even use this method, but you can!
When the check engine light turns on, it usually means one or more sensors are failing or malfunctioning. By following a few simple steps, you can figure out which sensor is the culprit—all with just a wire and your eyes.
Tools You Need to Diagnose Mira Engine
You don’t need fancy tools. Just grab:
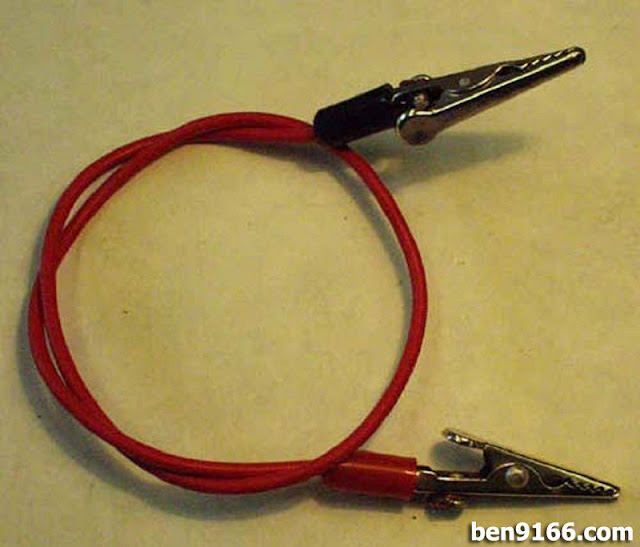
- A short jumper wire or paperclip
- Your car keys
- A little patience
Step-by-Step: Diagnose Mira Engine Using Blink Codes
1. Locate the Diagnostic Socket
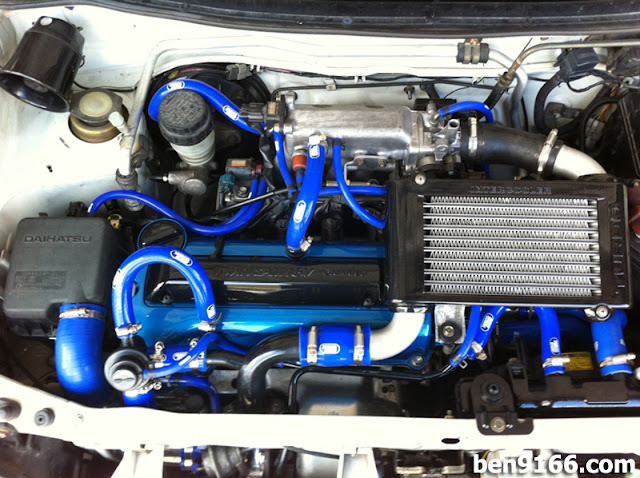
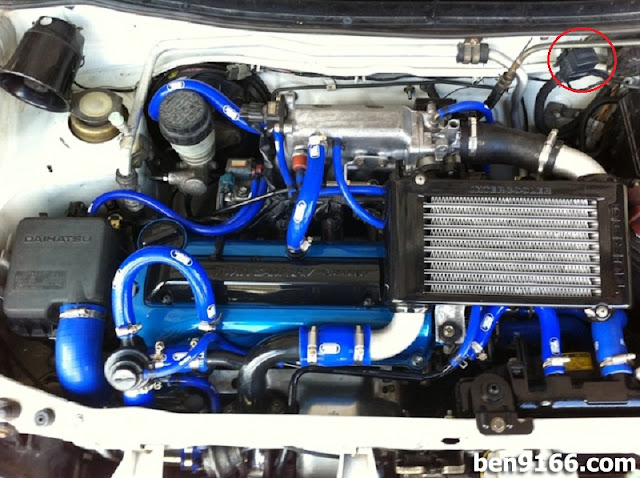
First, open your car’s engine bay. Look for a small rectangular diagnostic socket, usually near the firewall. It might be labeled, or you can refer to your manual.
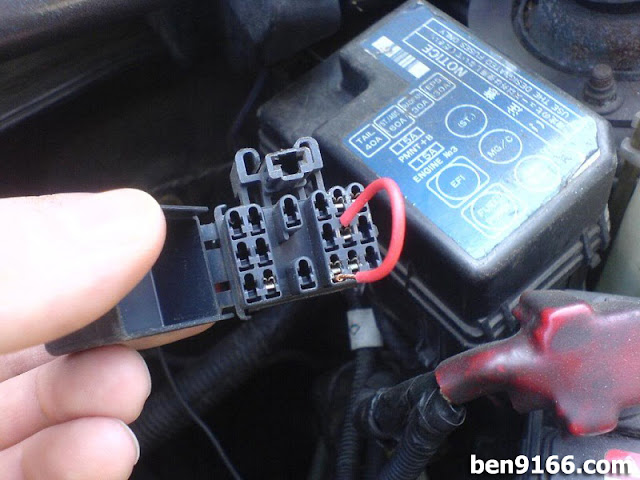
2. Insert the Jumper Wire
Now, insert the jumper wire into the correct terminals. For most Daihatsu Mira models, short the terminals labeled “TE1” and “E1”. If unsure, always refer to a wiring diagram or forum for your specific model.
3. Turn the Key to ON (But Don’t Start)
Turn the ignition key to the “ON” position, but do not start the engine. Look at your dashboard. The check engine light will start blinking in a pattern.
Reading and Understanding the Blink Codes
If there are no issues, the light will blink continuously and evenly.
However, if there is a fault, the light will blink in groups. For example:
- 5 blinks → pause → 2 blinks = Code 52
- 1 blink → pause → 3 blinks = Code 13
Each code represents a different sensor issue.
| Code | Fault Location / Diagnose Item | Probable Cause / Diagnose Content |
|---|---|---|
| 1 | Normal | No faults detected. Continuous blink. |
| 2 | Pressure Sensor | Faulty pressure sensor or circuit. |
| 3 | Ignition Signal | Ignition signal issue. |
| 4 | ECT Sensor | Engine coolant temperature sensor fault. |
| 5 | O2 Sensor / Fuel System | Oxygen sensor signal or fuel system fault. |
| 6 | Revolution Sensor | Crankshaft or camshaft revolution sensor failure. |
| 7 | Throttle Position (TP) Sensor | Throttle position sensor signal fault. |
| 8 | Intake Air Temp (IAT) Sensor | IAT sensor signal fault. |
| 9 | Vehicle Speed Sensor (VSS) | VSS signal malfunction. |
| 10 | Starter Signal | Faulty or missing starter signal. |
| 11 | Switch Signal | Switch signal malfunction. |
| 12 | EGR Control System | EGR valve or circuit fault. |
| 13 | Engine Revolution / Crank Position | Crank position sensor or wiring issue. |
| 14 | Camshaft Position Sensor | Camshaft position sensor fault. |
| 15 | Air-Fuel Ratio (Rich) | Mixture too rich. |
| 16 | Air-Fuel Ratio (Lean) / Ignition | Mixture too lean or ignition issue (duplicated code). |
| 17 | Multiple Misfire Detected | Random/multiple misfires. |
| 18 | Knock Sensor (KS) | Knock sensor circuit or wiring fault. |
| 21 | Primary Oxygen Sensor | Open or short in lambda sensor circuit. |
| 22 | Secondary Oxygen Sensor | Open or short in second O2 sensor circuit. |
| 23 | Primary O2 Sensor Heater | Heater element fault in primary O2 sensor. |
| 24 | Secondary O2 Sensor Heater / Mixture Adjustment Resistor | Heater fault or mixture resistor malfunction. |
| 25 | Lean Running | System running too lean. |
| 26 | Rich Running | System running too rich. |
| 27 | Catalytic Converter Efficiency | Below performance threshold. |
| 31 | MAP Sensor | Pressure sensor signal >4.9V or <0.7V. |
| 32 | Atmospheric (BARO) Sensor | BARO sensor malfunction. |
| 36 | Multiple Misfire Detected | Same as Code 17. |
| 41 | Throttle Position Sensor | TP sensor circuit fault. |
| 42 | ECT Sensor | Open/short in engine coolant temp circuit. |
| 43 | IAT Sensor | Intake air temp sensor open or short. |
| 44 | A/C Evaporator Temp Sensor | A/C evaporator temp sensor fault. |
| 45 | A/C Compressor Clutch | Clutch slip or overload, signal fault. |
| 51 | Switch Signal | A/C or idle switch signal fault with test terminal shorted. |
| 52 | Vehicle Speed Sensor (VSS) | VSS open/short circuit or signal issue. |
| 54 | Starter Signal | Missing due to bump start, open/short. |
| 61 | ECM Power Supply | ECM power fault. |
| 71 | Idle Speed Control System | Idle system malfunction. |
| 73 | Camshaft Position Actuator | Circuit fault. |
| 74 | Oil Control Valve | Circuit fault. |
| 75 | Camshaft Position Actuator | Same as 73. |
| 76 | Evap Canister Purge Valve | Circuit fault. |
| 81 | Immobilizer Signal | Rolling codes mismatch (Immobilizer ↔ ECU). |
| 83 | Immobilizer/ECU Communication | No code exchange between modules. |
What to Do After You Diagnose Mira Engine
Once you have the code:
- Look up the meaning of the code
- Inspect or replace the faulty sensor
- Clear the error (usually done by disconnecting the battery for a few minutes)
- Test again to make sure the problem is fixed
Conclusion: Quick, Cheap, and Effective
You don’t need a diagnostic scanner or a mechanic to diagnose your Mira engine. With just a jumper wire and a little time, you can decode the check engine light yourself. It’s fast, easy, and saves you money. Try it the next time your Mira flashes that warning light!
1 thought on “No Scanner? No Problem! Diagnose Your Mira Engine Easily”