If your Kancil window regulator isn’t working, you don’t need to panic. With the right tools and a bit of patience, you can replace it yourself. After all, the Kancil window regulator on my car malfunctioned, and since I don’t drive it much, I decided to fix it during the Movement Control Order (MCO). Working from home gave me the perfect opportunity to get my hands dirty and tackle this repair.
This guide will show you exactly how to replace your Kancil window regulator, even if you have no prior experience. With just a 10mm spanner and some careful steps, you can have your window working again.
Tools You’ll Need for the Job
Before diving in, gather the necessary tools:
- A 10mm spanner or socket wrench
- Small flathead screwdriver
- Patience (This is key!)
You don’t need a professional setup or a lot of experience to get the job done. Just follow these steps, and you’ll be good to go.
Step-by-Step Process to Replace Your Kancil Window Regulator
Step 1: Remove the Window Lever Metal Clip
Start by removing the metal clip holding the window lever. It can be a bit tricky, but don’t worry. If you don’t have a lock pin remover, a small flathead screwdriver will do the job. Carefully pry the clip off.
Step 2: Take Off the Window Lever
Once the metal clip is removed, you can pull off the window lever. Set it aside for now.
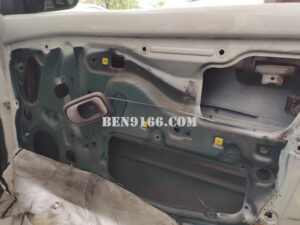
Step 3: Pull Off the Door Panel
Next, remove the door panel. You’ll likely need to unscrew a few screws that hold it in place. Gently lift the panel from the door frame once all screws are removed.
Step 4: Wind Down the Window (Halfway)
To get access to the window regulator, you’ll need to wind the window down halfway. This will expose all the screws and give you better visibility for the next steps.
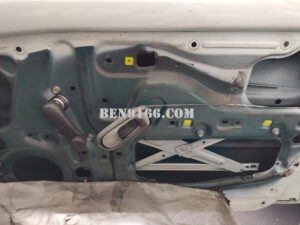
Step 5: Unscrew the Nuts and Remove the Window
Once you can see the nuts, unscrew them using the 10mm spanner. Be careful not to break the glass as you remove the window. Once you’ve detached it, set it aside.
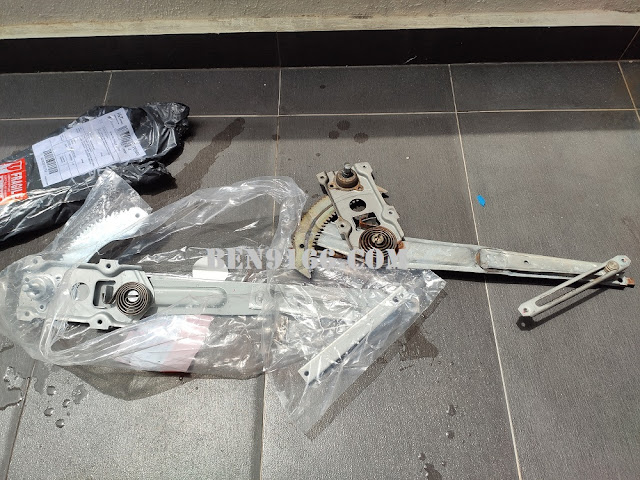
Step 6: Remove the Old Window Regulator
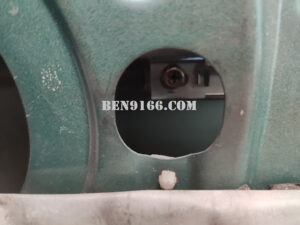
With the window out of the way, remove the old window regulator through the biggest hole in the door. Carefully take it out.
Step 7: Insert the New Window Regulator
Now, it’s time to slot in the new Kancil window regulator. Feed it through the same hole and position it correctly inside the door frame.
Step 8: Attach the Window to the New Regulator
Once the new regulator is in place, slot the window back onto it. Tighten everything to secure it properly.
Step 9: Secure the Regulator
Tighten the new window regulator to the door frame. Make sure everything is firmly in place to avoid any future issues.
Step 10: Reassemble the Door Panel
Now, put the door panel back onto the door. Reattach the window lever and secure it with the metal clip you removed earlier. Double-check that everything is tightened and secured properly.
Final Thoughts on Replacing the Kancil Window Regulator
Replacing your Kancil window regulator is a simple task that doesn’t require professional help. With just basic tools and a little patience, you can save time and money. Plus, the satisfaction of fixing it yourself is worth it! Just follow these steps, and you’ll have your window working again in no time.